
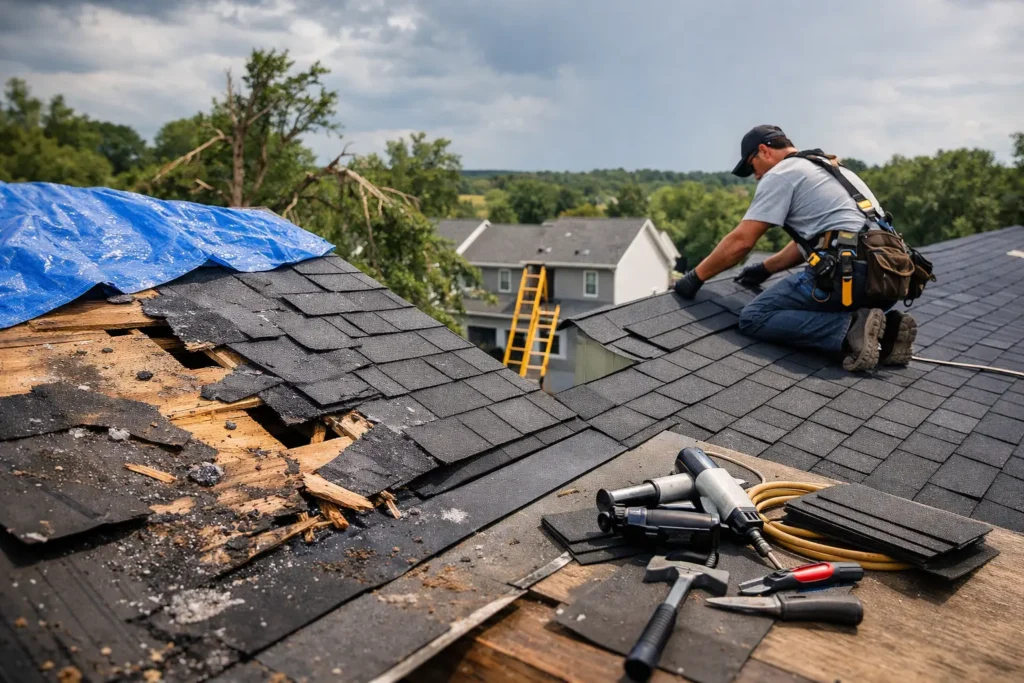
A storm damage roof restoration example can make one point clear: the missing shingles you see from the driveway may be only part of the problem. In Central New York, high winds, heavy snow, ice, and driven rain can loosen roofing materials and push water into places homeowners cannot see. The right response is not guessing whether the roof will hold. It is getting a prompt inspection, protecting the home from further damage, and making repairs based on what the roof actually needs.
Here is a representative restoration scenario that reflects the decisions many Syracuse-area homeowners face after a severe storm.
Storm Damage Roof Restoration Example: From Wind to Repair
A homeowner notices several shingle tabs in the yard after a night of strong wind and rain. From ground level, there appears to be a small bare area near a roof ridge. Inside, the homeowner does not see an active ceiling leak, so it is tempting to wait until spring or the next heavy rain.
That delay can be costly. Wind damage often breaks the seal that holds surrounding shingles in place. A shingle can look flat from the ground while its lower edge has lifted, creased, or lost its adhesive bond. Once rain gets under those shingles, water may reach the underlayment, roof decking, attic insulation, and eventually the drywall below.
In this example, the homeowner calls for a storm damage inspection within a few days. The roofing contractor checks the roof surface, flashing around penetrations, gutters, attic space, and visible interior areas. The inspection finds three related issues: missing shingles near the ridge, wind-lifted shingles on an adjacent slope, and bent metal flashing around a chimney.
There is no widespread decking rot and no major interior water damage. That matters. Because the damage is contained and the roof still has useful life remaining, a targeted restoration is a more sensible option than a full replacement.
Step One: Stop Further Water Entry
The first priority is securing the roof. If rain is expected before permanent work can begin, a temporary protective measure may be needed over exposed areas. This is not a substitute for repair, but it can reduce the chance of water entering the home while materials are ordered or an insurance claim is reviewed.
For a small, accessible damaged section, permanent work may move quickly. The crew removes compromised shingles rather than simply placing new ones over damaged material. They inspect the exposed area below for moisture staining, soft decking, and fastener damage. Any deteriorated decking should be replaced before new roofing materials go on. Covering a weak roof deck only hides a future problem.
The crew then installs the appropriate underlayment and replaces shingles with materials that match the existing roof as closely as possible. Exact color matching can depend on the roof’s age, sun exposure, and product availability. A good contractor will set that expectation early instead of promising an invisible patch that may not be realistic.
Step Two: Address the Details That Cause Leaks
Roof restoration is rarely just about shingles. In this example, the chimney flashing sustained damage when wind lifted nearby shingles and shifted the metal edge. Flashing is one of the most common sources of roof leaks because it protects the transition between the roofing system and vertical surfaces such as chimneys, walls, skylights, and vents.
The damaged flashing is removed and replaced or properly reset, depending on its condition. The surrounding shingles are integrated correctly so water sheds over the flashing instead of behind it. If the chimney mortar has cracks or loose joints, that should be assessed as well. Water can enter through failed masonry and look very similar to a roof leak inside the home.
This is where experience matters. A fast repair that ignores flashing, pipe boots, ridge caps, or ventilation components may look finished from the street but leave the real entry point behind. Restoration work should correct the storm damage and restore the roof’s ability to manage water as a complete system.
Step Three: Document Damage for an Insurance Claim
Whether insurance is involved depends on the policy, deductible, type of storm event, age of the roof, and the extent of damage. Homeowners should not assume a claim will automatically cover every repair, but they also should not dismiss storm damage without documentation.
In this case, the homeowner receives clear photos and written findings showing missing shingles, wind creases, and flashing damage. This gives the homeowner useful information when speaking with the insurance carrier. A contractor can explain the scope of visible damage and provide an estimate, while the insurer determines coverage under the policy.
Keep copies of photos, inspection notes, receipts for emergency protection, and all claim correspondence. Avoid signing away control of the claim process or agreeing to work before you understand the scope, price, and payment terms. Straight answers and transparent documentation protect homeowners from surprises.
Why a Repair Was the Right Choice Here
A full roof replacement is sometimes necessary after a storm, especially when wind damage is spread across multiple slopes, shingles are brittle and difficult to repair, the roof is near the end of its service life, or water has caused extensive deck damage. But replacement is not always the honest answer.
For this homeowner, the roof was otherwise in serviceable condition. The storm damage was localized, the decking beneath the affected area was sound, and the new materials could be integrated without compromising the roof’s performance. A focused repair addressed the immediate risk while preserving the homeowner’s budget.
That trade-off is why an in-person inspection matters. A roof that needs a few shingles and flashing repairs should not be sold as a replacement project. On the other hand, a roof with widespread wind lifting should not be treated with a cosmetic patch simply because it is less expensive upfront.
What Homeowners Should Do After a Storm
Start from the ground. Look for shingles, pieces of flashing, gutter sections, or granules collecting near downspouts. Check ceilings, upper walls, and attic areas for fresh stains, damp insulation, musty odors, or visible daylight. Do not climb onto a wet, icy, or damaged roof. It is unsafe and can cause more damage.
Call for an inspection sooner rather than later if you notice missing materials, a new leak, or anything that looks out of place. The sooner damage is documented and protected, the easier it is to limit moisture intrusion. If there is active water entering the home, move belongings away from the area and use containers to catch drips while you arrange emergency service.
Alpha Omega Roofing LLC helps homeowners throughout Syracuse and Central New York understand what happened to their roof, what needs attention now, and what can reasonably wait. You should receive a clear explanation of the findings, a straightforward estimate, and repair recommendations based on the condition of your home, not pressure.
A storm does not have to turn into a long-term roof problem. Have the damage checked, keep good records, and choose repairs that restore protection where it counts most: beneath the shingles, around the flashing, and over the home your family relies on.