
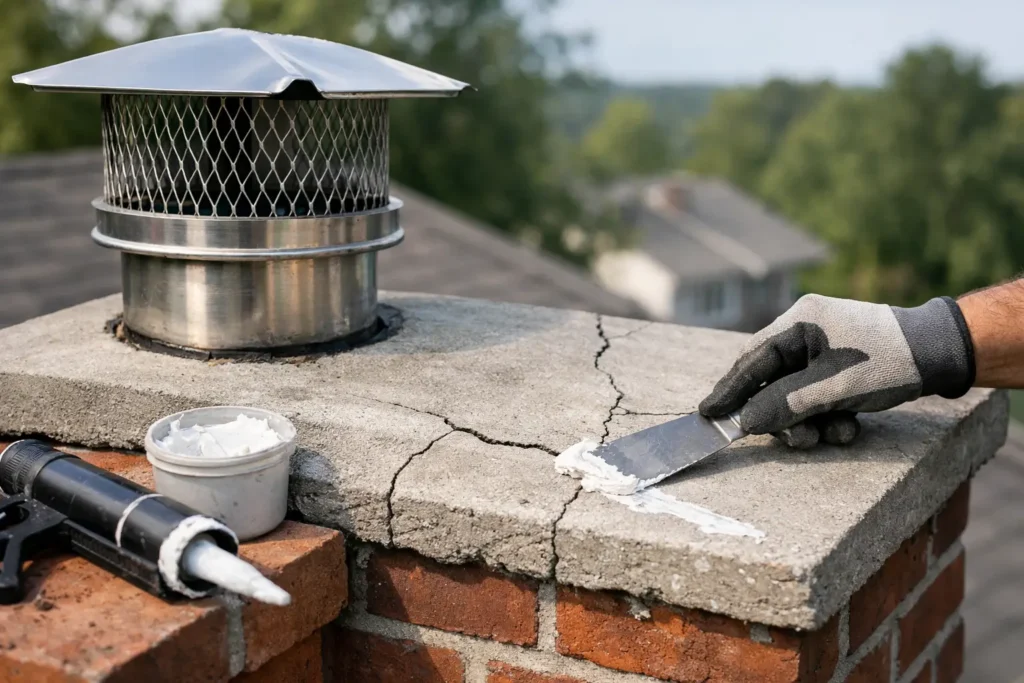
A cracked chimney crown can look like a small masonry issue from the ground, but it is often the first opening water needs to get into your chimney. Knowing how to fix chimney crown cracks can help you act before freeze-thaw weather, heavy rain, and wind-driven snow turn a surface crack into a leaking chimney, damaged brick, or costly interior repair.
For homeowners in Central New York, timing matters. Water enters a crack, freezes, expands, and widens that opening through the winter. By spring, a minor defect can become loose mortar, spalling brick, rusted fireplace components, or water stains near the chimney.
What a Chimney Crown Does
The chimney crown is the sloped concrete top that covers the chimney stack around the flue. Its job is simple: shed water away from the brick and keep moisture from entering the chimney structure.
A properly built crown extends past the chimney walls and has a drip edge underneath. That overhang keeps runoff from washing down the masonry face. It is different from the flue tile, chimney cap, flashing, and the mortar wash sometimes used on older chimneys.
When the crown is flat, thin, poorly sloped, or cracked, water sits where it should be draining. That is why crown damage deserves attention even when there is no active leak inside the home.
How to Fix Chimney Crown Cracks Safely
The right repair depends on the crack size, the condition of the concrete, and whether water has already damaged the masonry below. A narrow surface crack in an otherwise solid crown may be repairable with a quality crown sealant. A crown that is crumbling, separating from the flue, or showing multiple deep cracks usually needs to be rebuilt.
Before doing anything, inspect from a safe position. Do not climb onto a steep, wet, icy, or aging roof just to get a closer look. A pair of binoculars, photos from a safe ladder position, or a professional inspection can reveal a surprising amount.
Step 1: Confirm That the Crown Is the Problem
Look for visible cracks across the concrete, missing chunks, worn edges, and dark areas that suggest the crown stays wet. Check the brick directly below it for flaking faces, loose mortar, white mineral staining, or discoloration. Those signs often mean water has been escaping the crown for some time.
It is also worth checking the chimney flashing where it meets the roof. Flashing leaks can mimic crown problems, and a complete inspection should separate the two before repairs begin.
Step 2: Clean and Prepare Small Surface Cracks
For a hairline crack that is dry and limited to the crown surface, remove loose debris, dirt, moss, and failing patch material. The crack and surrounding concrete must be clean enough for the repair material to bond.
Do not use ordinary interior caulk, spray foam, or a quick smear of mortar. These materials often fail outdoors because chimney crowns expand, contract, and absorb moisture under extreme weather exposure. A repair should use a flexible masonry crack sealant or a purpose-made crown repair product rated for exterior chimney use.
Step 3: Apply the Correct Repair Material
Work only in dry conditions and within the product’s temperature range. Fill the crack completely, tool the material smooth, and make sure it does not create a low spot where water can collect. If the crown surface is worn but structurally sound, a compatible crown coating may be applied across the entire crown after crack repairs cure.
The goal is not simply to hide the crack. The repair needs to create a weather-resistant surface that keeps water moving away from the chimney.
Step 4: Check the Flue and Crown Edges
The joint around the flue tile is a common failure point. It needs enough flexibility to accommodate movement without opening again. The crown should also project beyond the brick edges. If it ends flush with the masonry, water can run directly down the chimney walls and accelerate deterioration.
A chimney cap is another worthwhile layer of protection. It helps keep rain, snow, animals, and debris out of the flue, but it does not replace a sound crown.
When a Crack Repair Is Not Enough
Sealant is a practical repair for small, stable cracks. It is not a cure for a failing crown. If the concrete is soft, deeply cracked, visibly separated, or missing sections, spot repairs may only delay a larger problem.
A full crown replacement is usually the better long-term choice when the old crown is thin or improperly shaped. The damaged material is removed, the chimney top is prepared, and a new reinforced concrete crown is formed with the correct slope, overhang, and drip edge. This takes more work upfront, but it addresses the reason the crown failed rather than covering the symptoms.
You should arrange a professional chimney assessment if you notice any of the following:
- Cracks wider than a hairline or cracks that continue to grow
- Chunks of concrete falling from the chimney top
- Flaking brick, loose mortar joints, or water staining below the crown
- A crown that holds standing water after rain
- Leaks in the attic, ceilings, walls, or fireplace area near the chimney
These conditions can point to more than a surface defect. Water may be moving through masonry, failing flashing, damaged flue components, or deteriorated mortar joints.
Common Mistakes That Make Chimney Crown Damage Worse
The most common mistake is waiting until a roof or ceiling leak appears. By that point, moisture may have already worked behind the brick and into the home. Chimney repairs are generally more straightforward when damage is caught at the crown.
Another mistake is coating over loose or wet material. A coating cannot stabilize crumbling concrete, and trapping moisture under a patch can speed up freeze-thaw damage. The surface must be sound, clean, and dry before any repair product is applied.
Homeowners also sometimes confuse a mortar wash with a proper concrete crown. A thin mortar layer may crack quickly, especially in Syracuse-area winters. A durable crown needs adequate thickness, reinforcement when appropriate, positive slope, and an overhang that protects the brick below.
Finally, do not overlook roof access and fall safety. Chimneys are often located near roof edges or on steep slopes, and masonry debris can make footing worse. A professional has the equipment to inspect the crown closely without creating a second problem on the roof.
Protecting a Repaired Chimney Crown
After repair or replacement, inspect the chimney at least once a year and after major wind, hail, or ice events. Pay attention to changes in the crown, exposed brick, mortar joints, flashing, and chimney cap. Early action is far less expensive than rebuilding a chimney stack after years of water intrusion.
Keeping gutters clear also helps. Overflowing gutters can soak nearby roof and wall areas, making it harder to identify the true source of a chimney leak. If you see interior staining, do not assume the crown is the only cause. A proper inspection should look at the full chimney and roof connection.
Alpha Omega Roofing LLC helps homeowners identify whether a cracked crown needs a targeted repair, a full rebuild, flashing work, or related roof repairs. You should get a clear explanation of the condition, the repair options, and the expected scope before work begins.
A chimney crown is a small part of your exterior, but it protects one of the most exposed areas of your home. Addressing cracks while they are still manageable can keep water outside, where it belongs.